> For the complete documentation index, see [llms.txt](https://docs.personaldiscount.io/llms.txt). Markdown versions of documentation pages are available by appending `.md` to page URLs; this page is available as [Markdown](https://docs.personaldiscount.io/discounteo-for-shopify/integrate-discounteo-with-your-email-service-provider/mailerlite/how-to-create-follow-up-on-purchases-campaign-with-mailerlite.md).

# How to create Follow up on purchases campaign with MailerLite

One of the best ways to encourage a customer to continue shopping in your store in the future is to give them a discount code.

In this article, we will show how to set up Follow up on purchases campaign with MailerLite and  Discounteo.

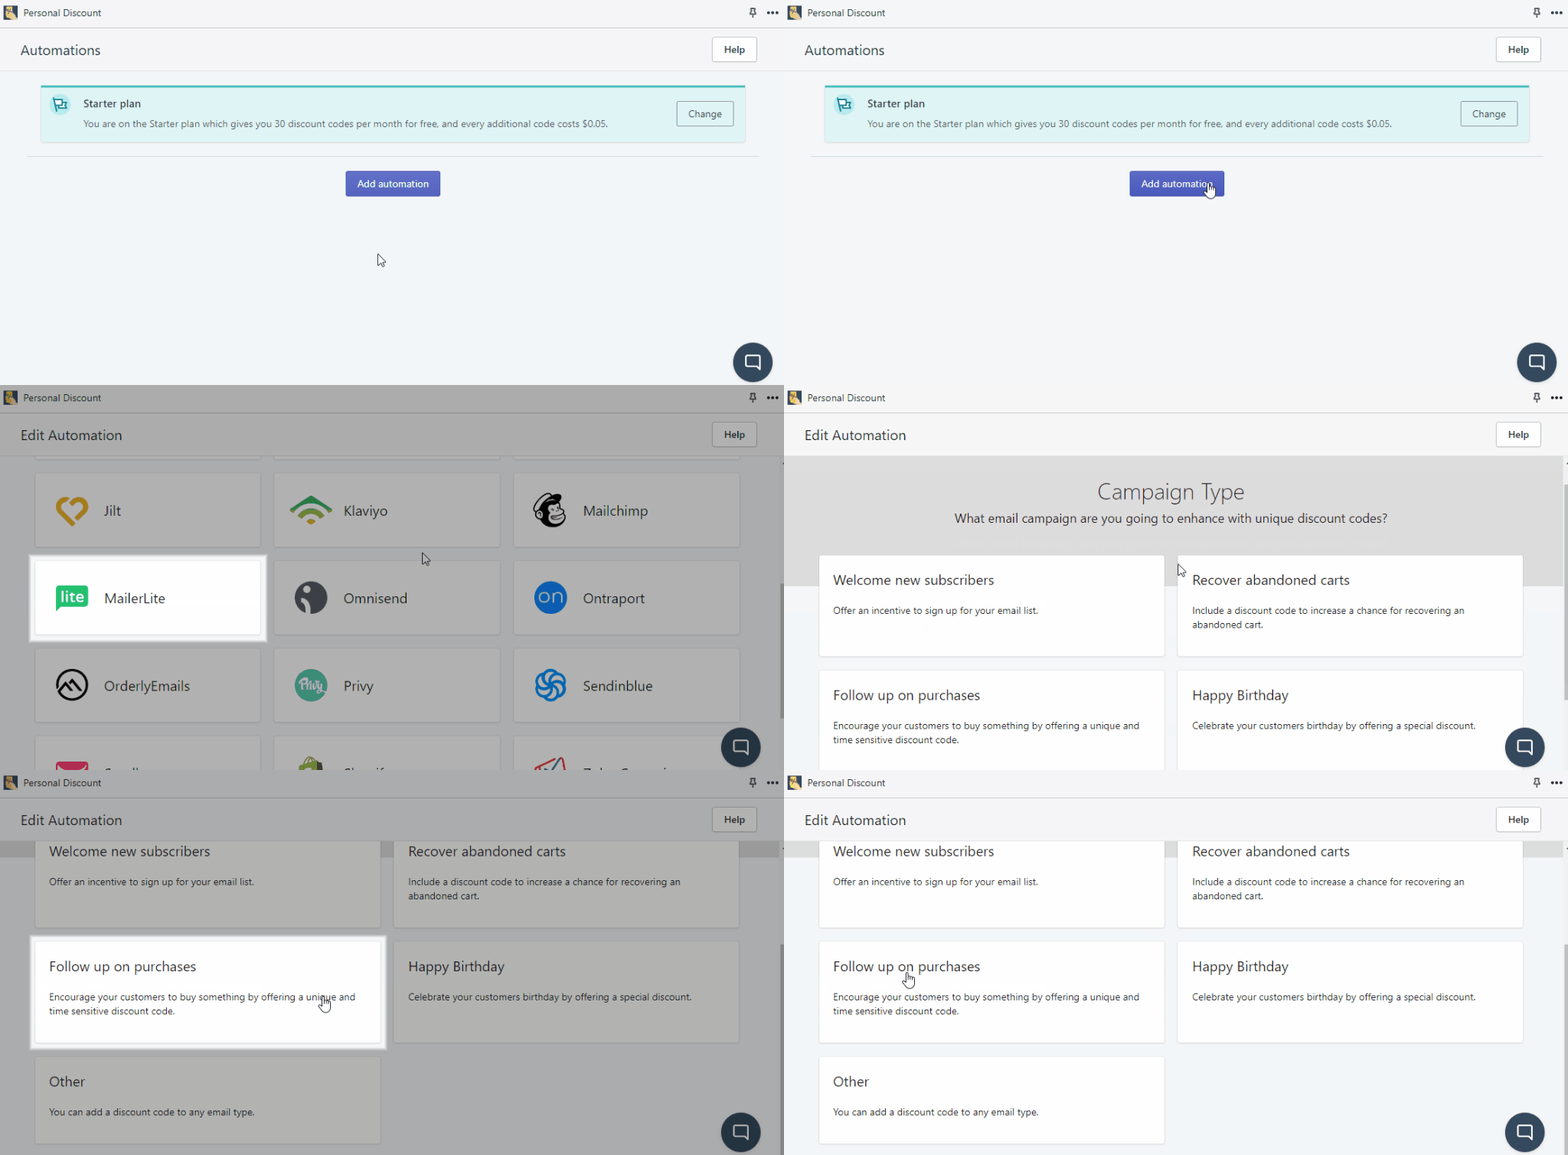
Navigate to your **Shopify dashboard** > **Apps** > Discounteo. Select **MailerLite** as your email service provider and **Follow up on purchases** as the campaign type.

<figure><img src="https://3731721370-files.gitbook.io/~/files/v0/b/gitbook-x-prod.appspot.com/o/spaces%2F-LZdVZovthV0SPlgxS6Y%2Fuploads%2FsWjYOnvTeNTyFbaGM0ZO%2Fshopify-mailerlite-post-purchase-automation-animated.gif?alt=media&amp;token=028d0b39-9037-4957-b23b-e377951f2835" alt="Add a Personal Discount automation for a follow-up-on-purchases campaign with MailerLite"><figcaption><p>Add Discounteo to a MailerLite automation</p></figcaption></figure>

Next, specify your automation details. Set the discount pattern, value, expiration date, etc. Take a look at the article on [how to configure discount](/discounteo-for-shopify/configure-discount.md) to find more information.

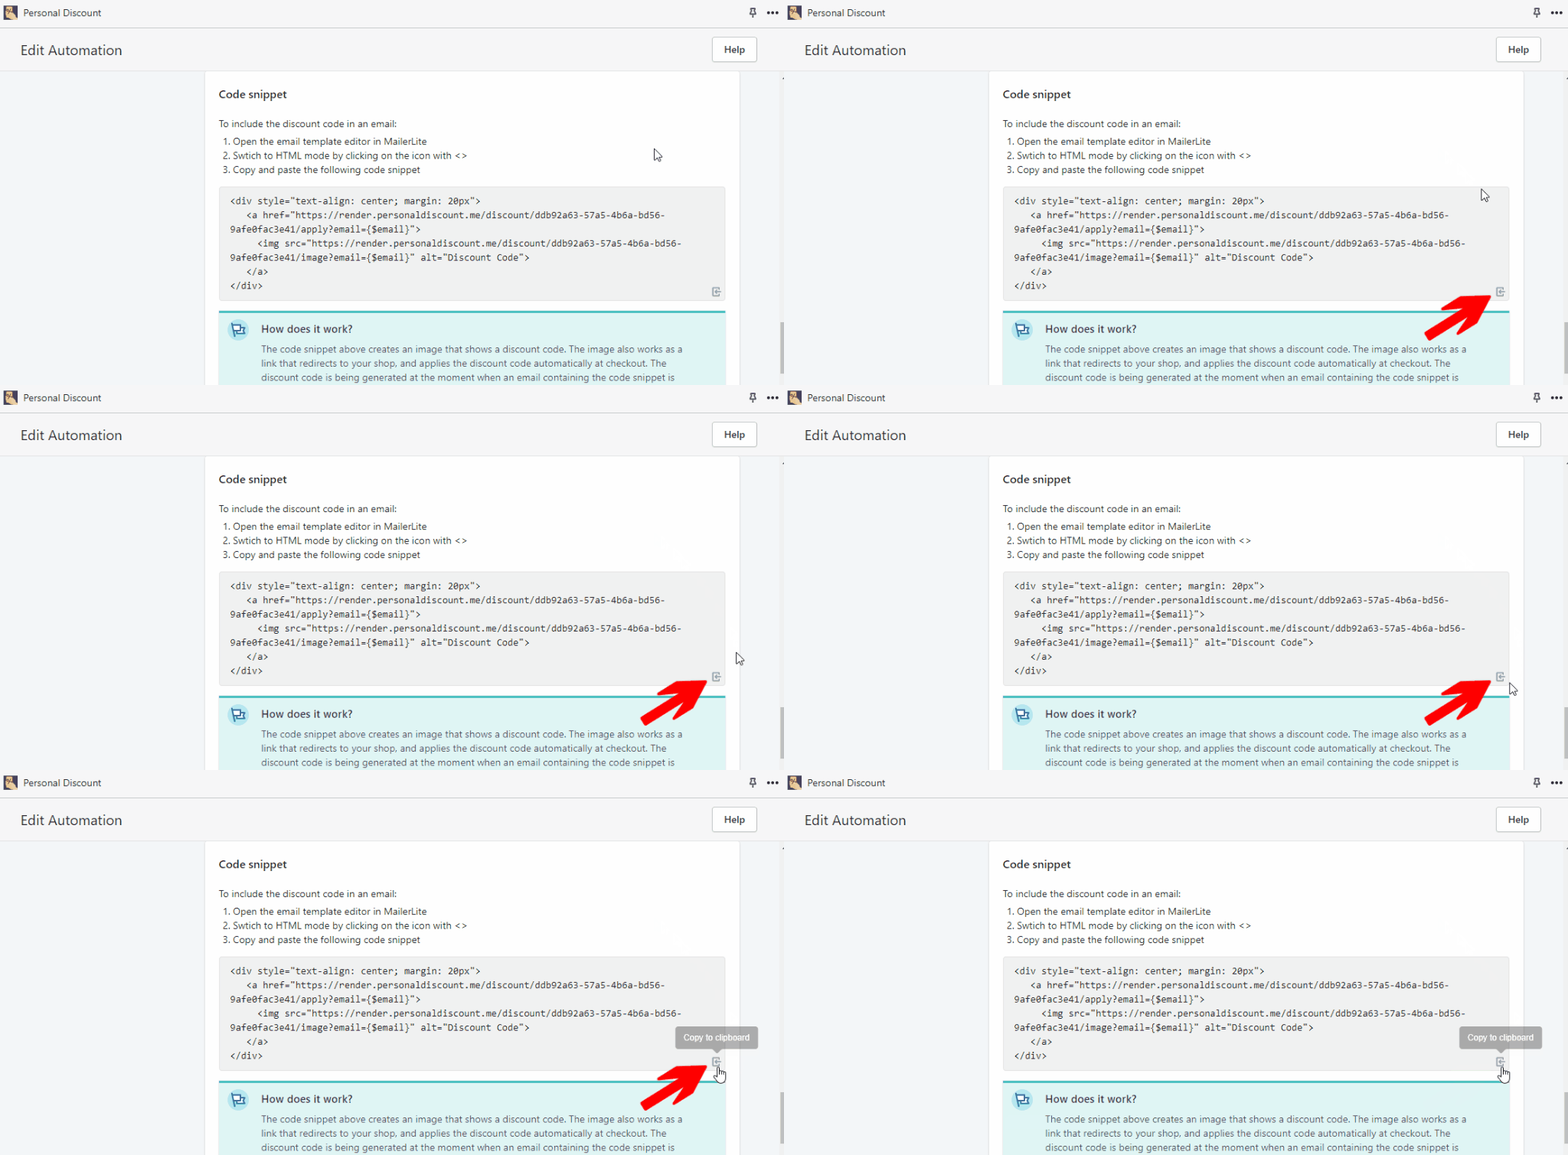
**Save** your automation and copy the code snippet from the bottom of the page to the clipboard.

<figure><img src="https://3731721370-files.gitbook.io/~/files/v0/b/gitbook-x-prod.appspot.com/o/spaces%2F-LZdVZovthV0SPlgxS6Y%2Fuploads%2FfU994XprRhmi0T0dVoO8%2Fshopify-mailerlite-copy-personal-discount-code-snippet-animated.gif?alt=media&amp;token=a75a4dfc-fd1e-49cd-9bcb-c14ecebc97f5" alt="Copy the Personal Discount automation code snippet"><figcaption><p>Copy the Discounteo code snippet</p></figcaption></figure>

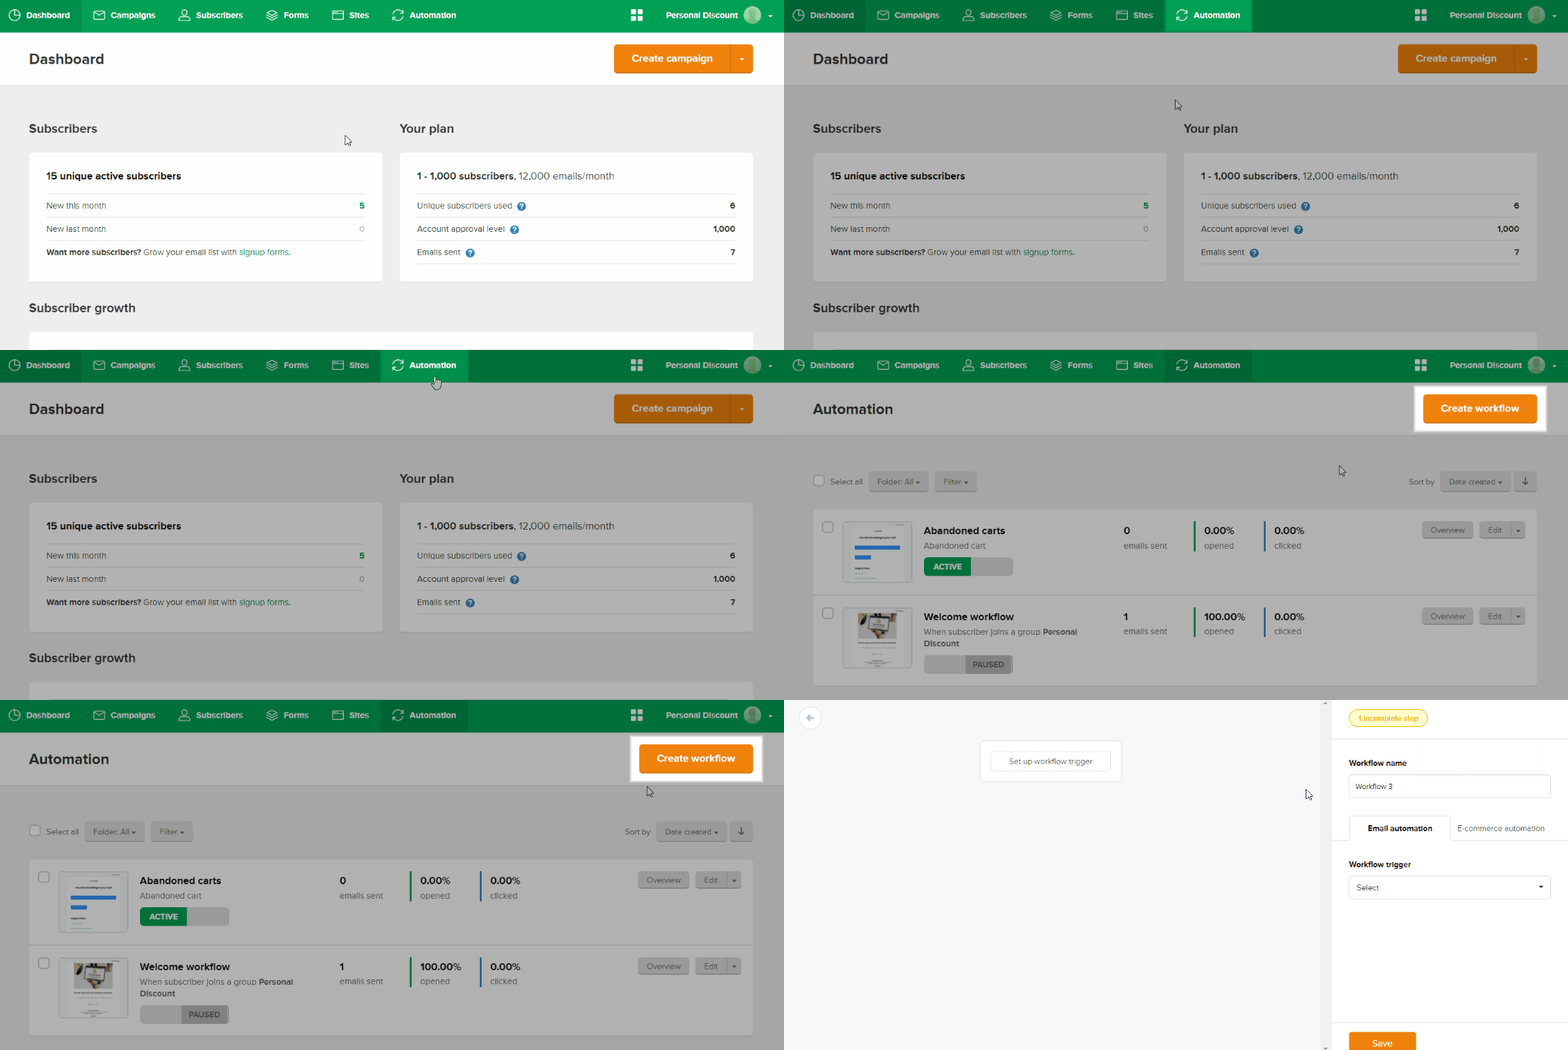
Switch over to your **MailerLite dashboard**. Go to the **Automation** section and click **Create workflow**.

<figure><img src="https://3731721370-files.gitbook.io/~/files/v0/b/gitbook-x-prod.appspot.com/o/spaces%2F-LZdVZovthV0SPlgxS6Y%2Fuploads%2FHTYhxyfM1p25mejXCfJm%2Fshopify-mailerlite-create-workflow-animated.gif?alt=media&amp;token=ed910f92-1c1b-4429-bdc3-7d888434075c" alt="Create a MailerLite workflow"><figcaption><p>Create a MailerLite workflow</p></figcaption></figure>

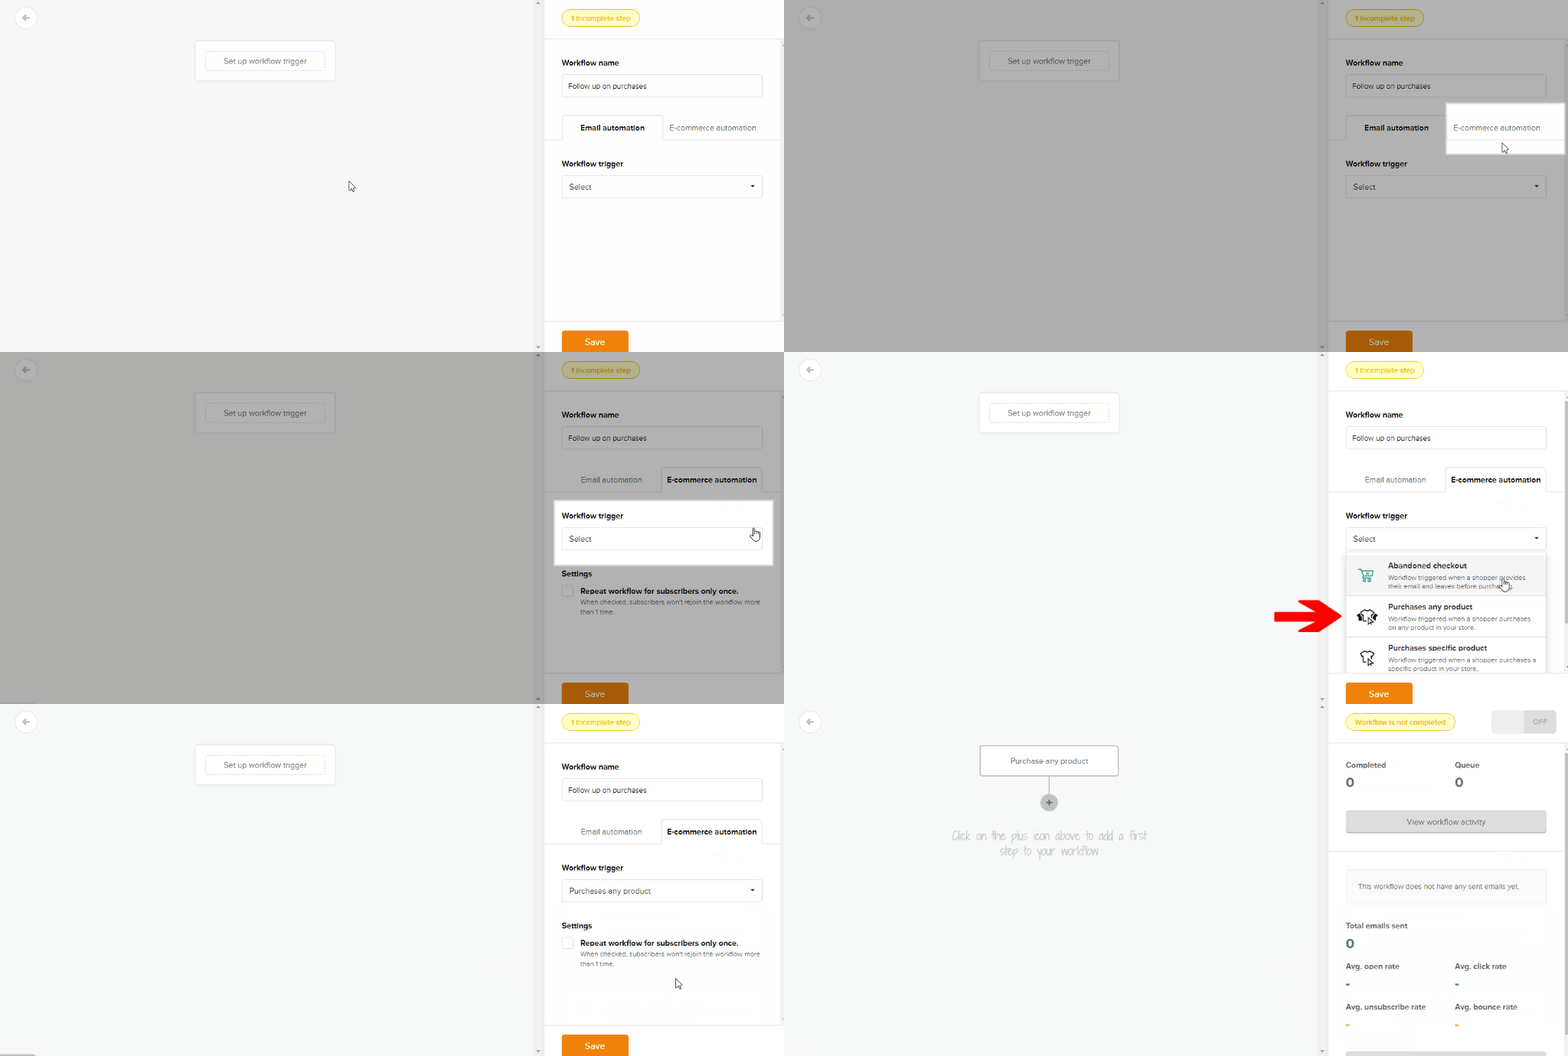
Set up the event that will trigger the automation. Open the **E-commerce automation** section, drop down the Workflow trigger menu and select **Purchases any product**. Then hit **Save**.

<figure><img src="https://3731721370-files.gitbook.io/~/files/v0/b/gitbook-x-prod.appspot.com/o/spaces%2F-LZdVZovthV0SPlgxS6Y%2Fuploads%2FsNnz77MqrgSqU3YIwTwd%2Fshopify-mailerlite-set-purchases-any-product-trigger-animated.gif?alt=media&amp;token=b9429b57-cb9b-4fc8-83ab-6f0f44035077" alt="Set &#x22;Purchases any product&#x22; as the trigger in MailerLite"><figcaption><p>Set the automation trigger</p></figcaption></figure>

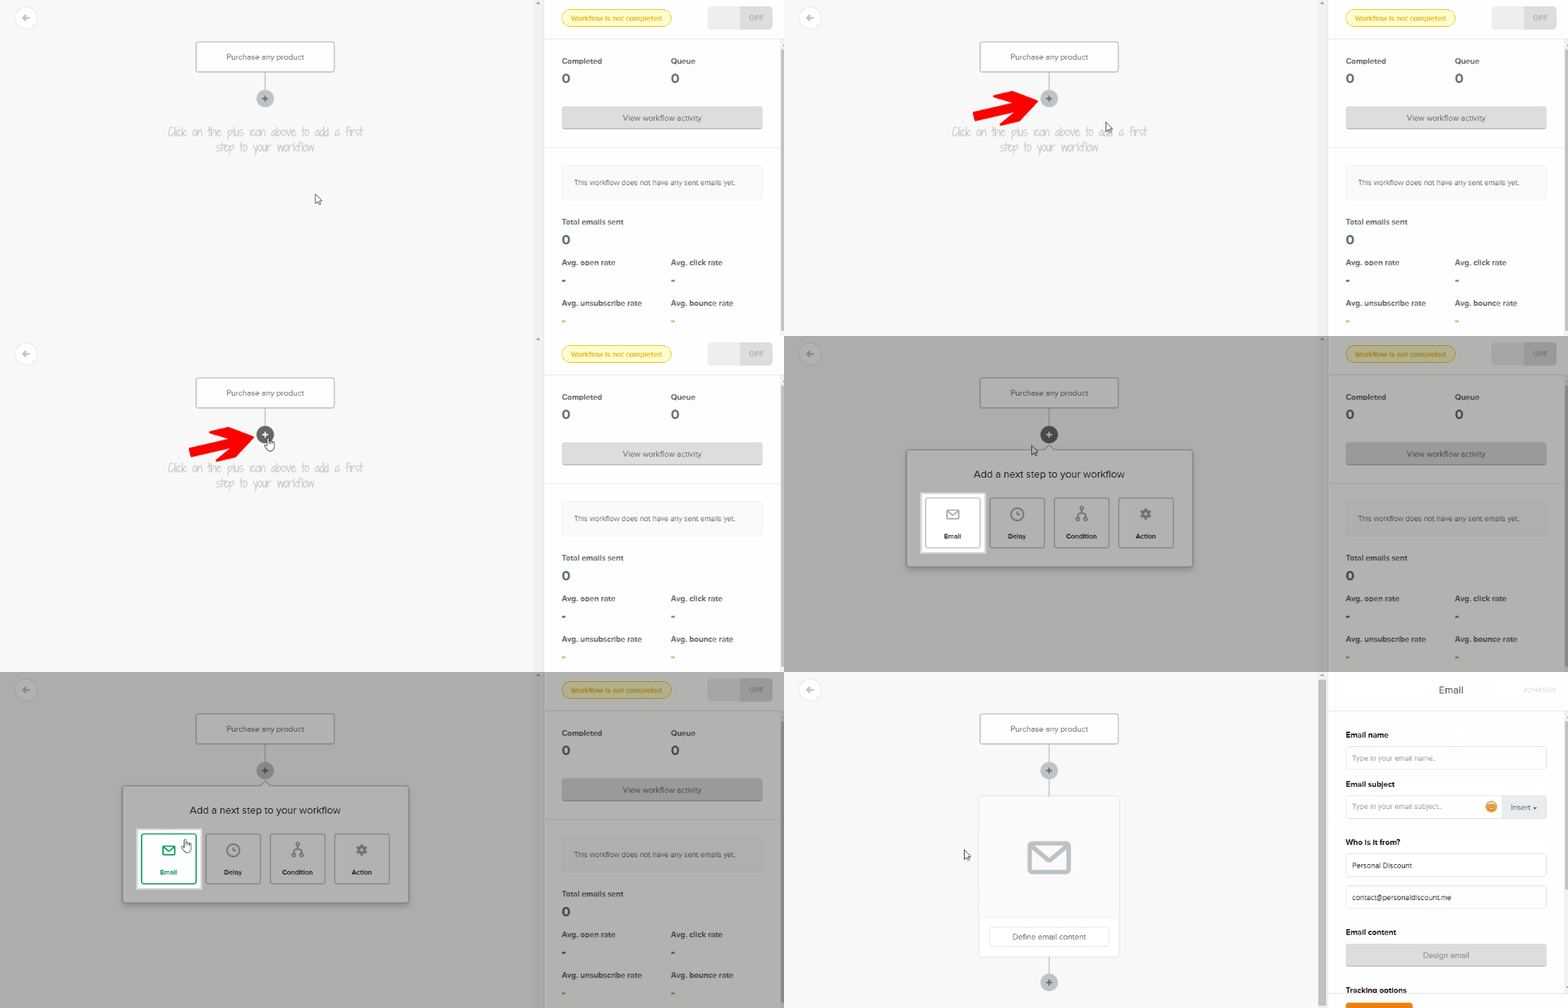
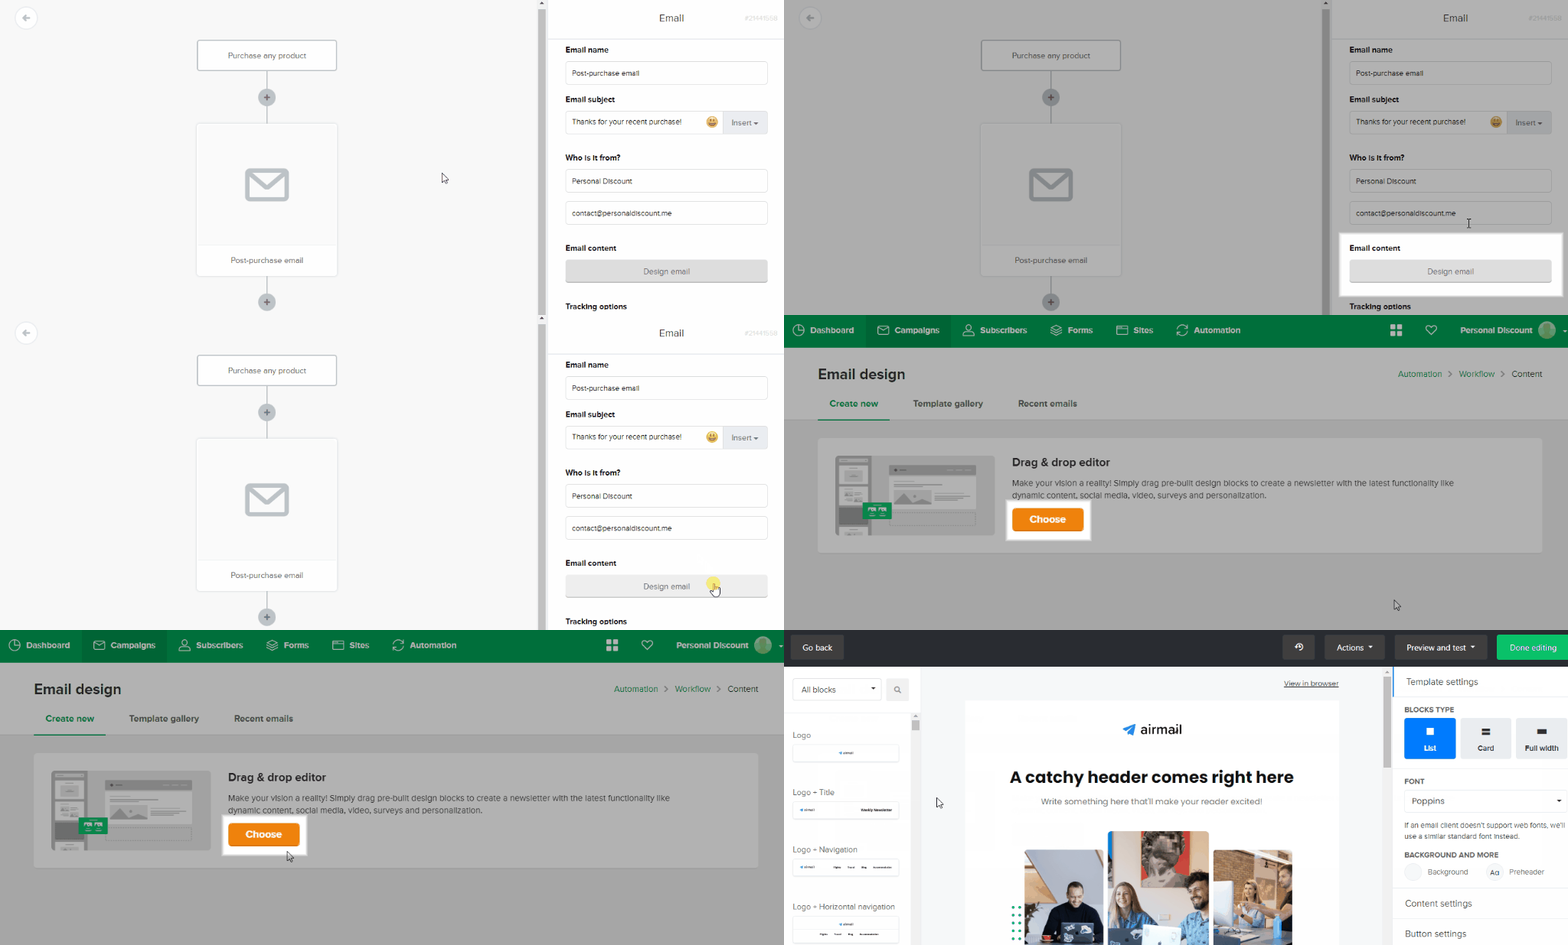
Now add the action that will be performed when a customer enters this automation. We would like to send an email.

<figure><img src="https://3731721370-files.gitbook.io/~/files/v0/b/gitbook-x-prod.appspot.com/o/spaces%2F-LZdVZovthV0SPlgxS6Y%2Fuploads%2FKyHtIKtfi4V7Lh31Sd31%2Fshopify-mailerlite-set-sending-email-by%20your-automation-animated.gif?alt=media&amp;token=5932680d-8a3f-469c-b142-dd4df809aa3e" alt="Add email sending to your MailerLite automation"><figcaption><p>Add email sending to your automation</p></figcaption></figure>

Next, design your message. We will use the drag and drop editor.

<figure><img src="https://3731721370-files.gitbook.io/~/files/v0/b/gitbook-x-prod.appspot.com/o/spaces%2F-LZdVZovthV0SPlgxS6Y%2Fuploads%2FljGFGdbud1NmgsxD8vZF%2Fshopify-mailerlite-design-email-drag-and-drop-editor-animated.gif?alt=media&amp;token=661fabbd-bfc0-425b-a986-a8231255e246" alt="MailerLite email editor with drag-and-drop design tools for creating email campaigns"><figcaption><p>Choose the drag-and-drop editor to design your email</p></figcaption></figure>

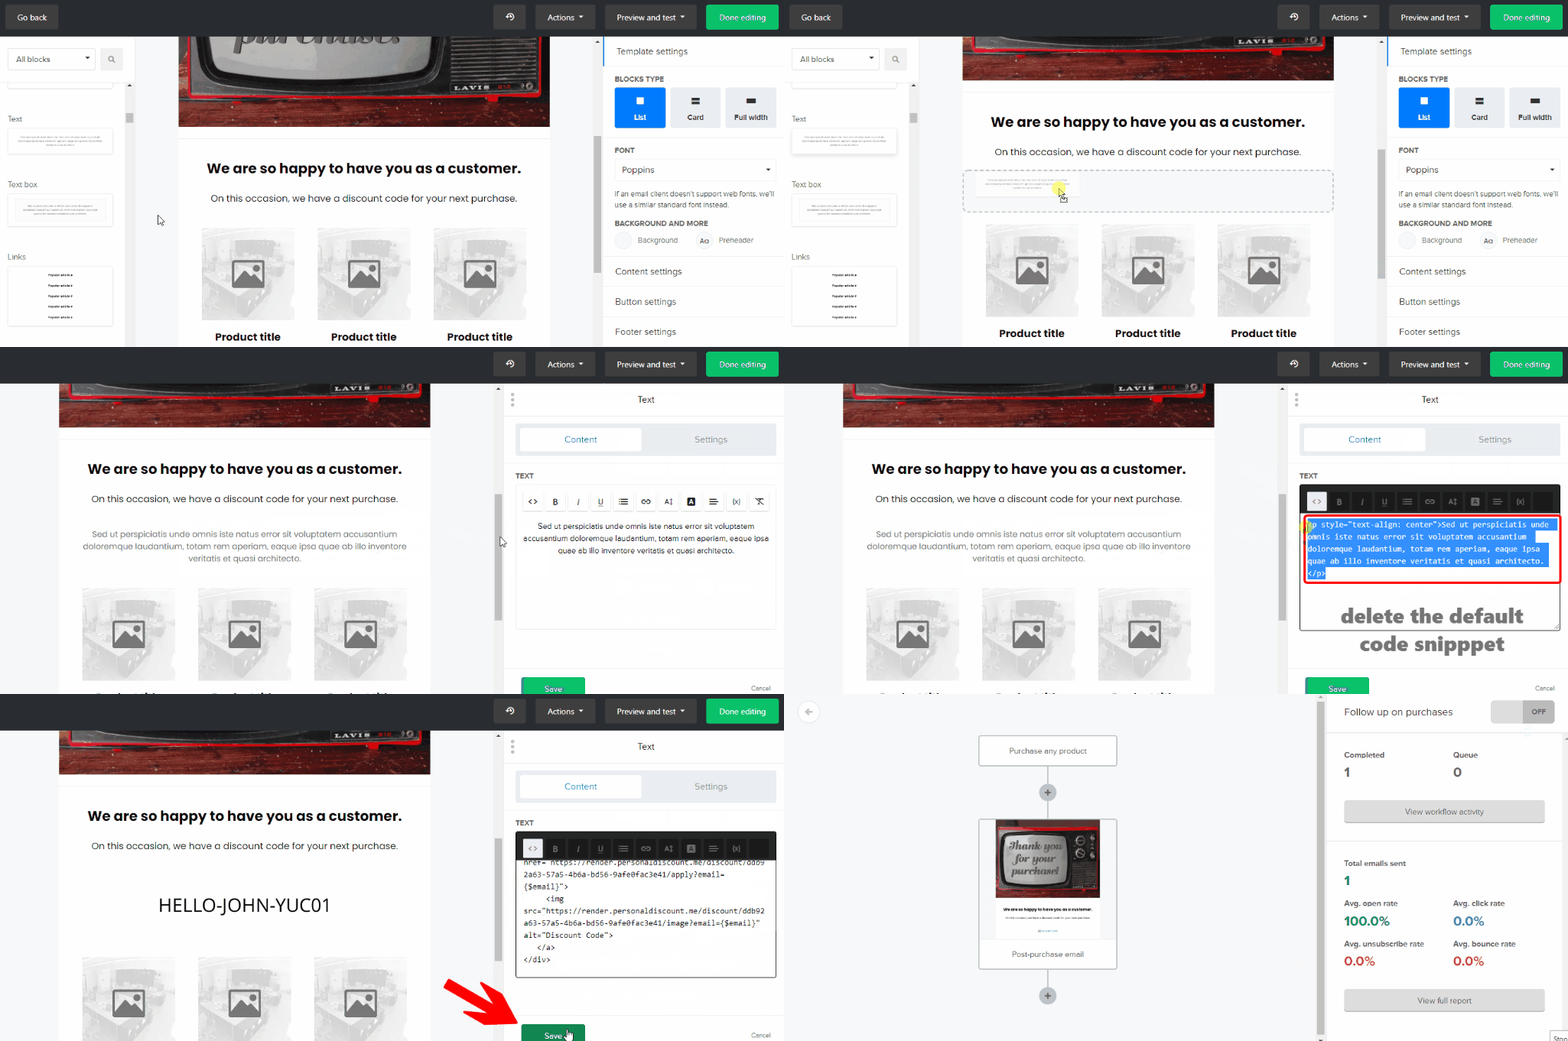
Drag and drop a **text** element into your template and **Edit** it. Switch over to the **HTML view**. Delete the default code snippet and paste the one from Discounteo. Then **Save** the element and entire template by clicking the **Done editing** button.&#x20;

<figure><img src="https://3731721370-files.gitbook.io/~/files/v0/b/gitbook-x-prod.appspot.com/o/spaces%2F-LZdVZovthV0SPlgxS6Y%2Fuploads%2Fh9oMG0WiwAizf0S5bU6X%2Fshopify-mailerlite-insert-personal-discount-code-into-email-template-animated.gif?alt=media&amp;token=38f0c0e5-749f-4100-a916-55b9bd6da493" alt="Paste HTML code snippet into a MailerLite email template"><figcaption><p>Paste the code snippet into your MailerLite email template</p></figcaption></figure>

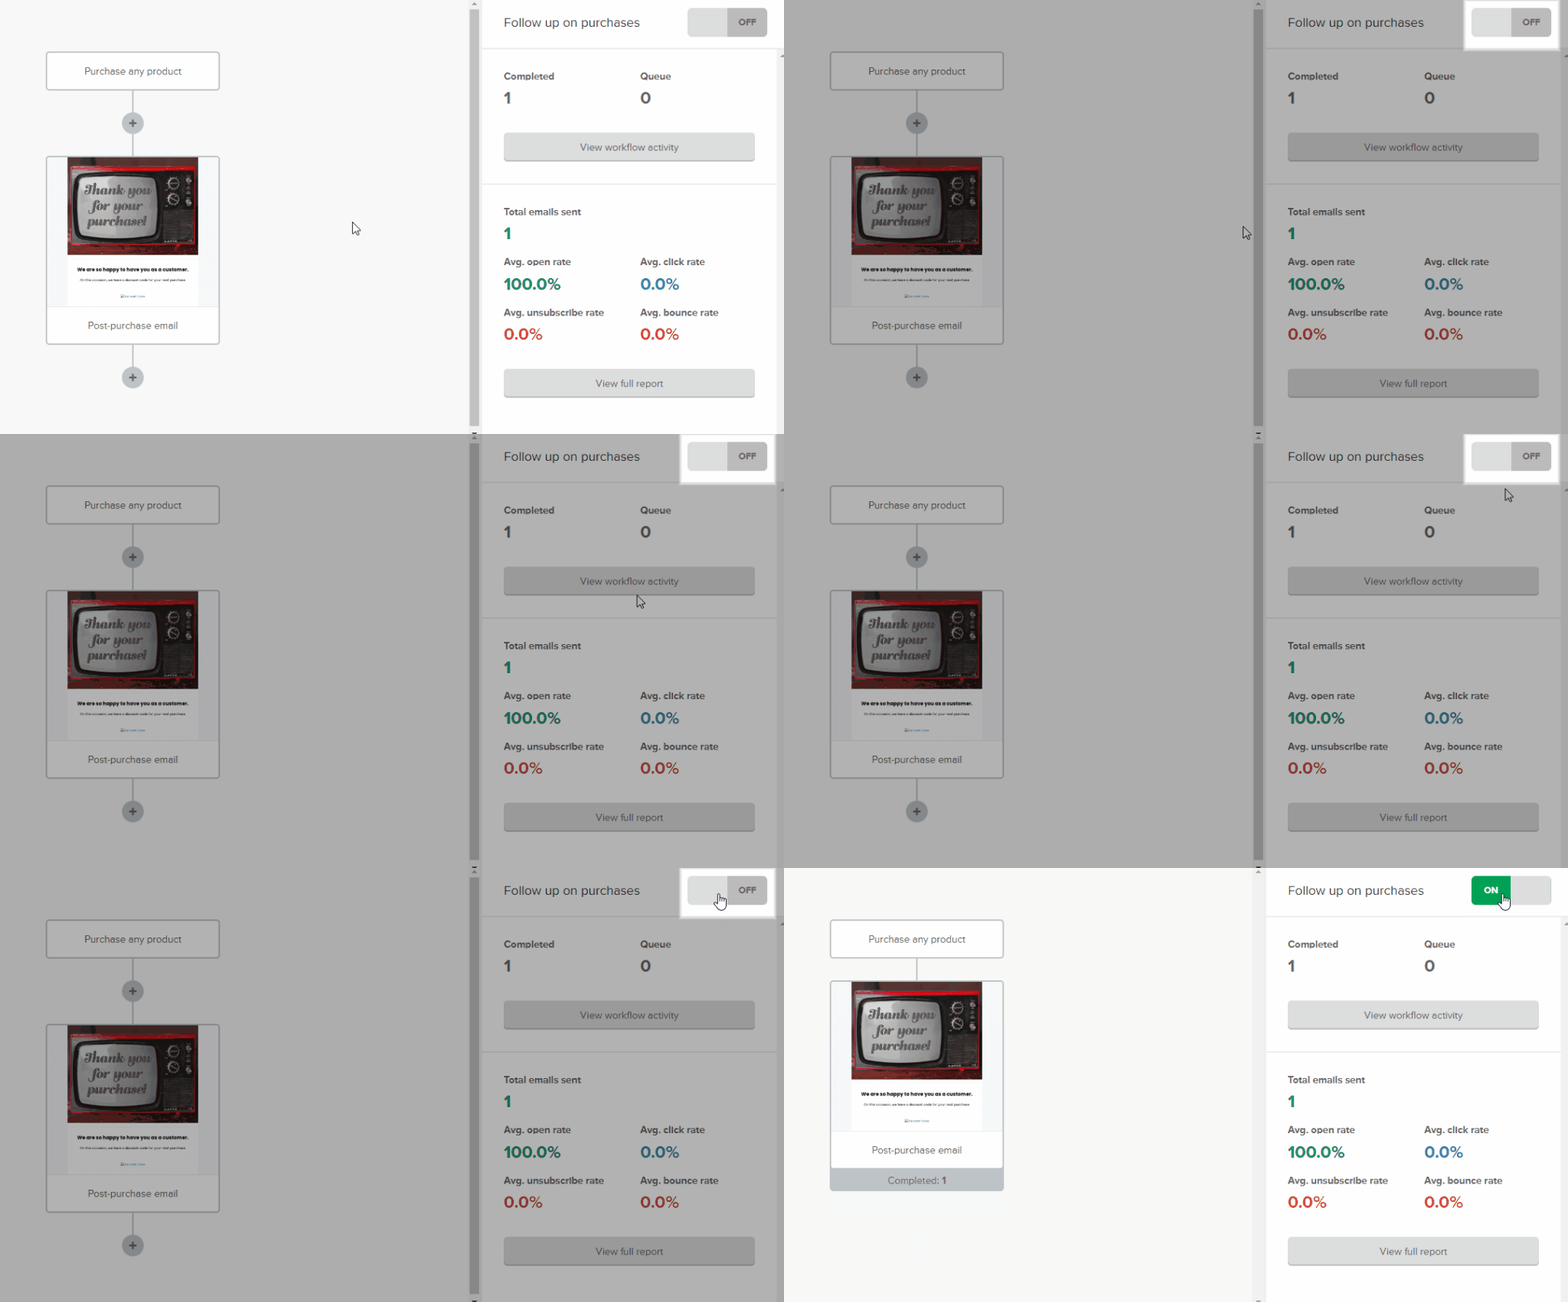
In the end, switch on your automation.&#x20;

<figure><img src="https://3731721370-files.gitbook.io/~/files/v0/b/gitbook-x-prod.appspot.com/o/spaces%2F-LZdVZovthV0SPlgxS6Y%2Fuploads%2FBBC6XFcT9aFdjNW4h64A%2Fshopify-mailerlite-switch-on-automation-animated.gif?alt=media&amp;token=f27affc9-c1a0-4819-a325-5157c403571b" alt="Enable a MailerLite automation to start sending emails automatically"><figcaption><p>Switch on the MailerLite automation</p></figcaption></figure>

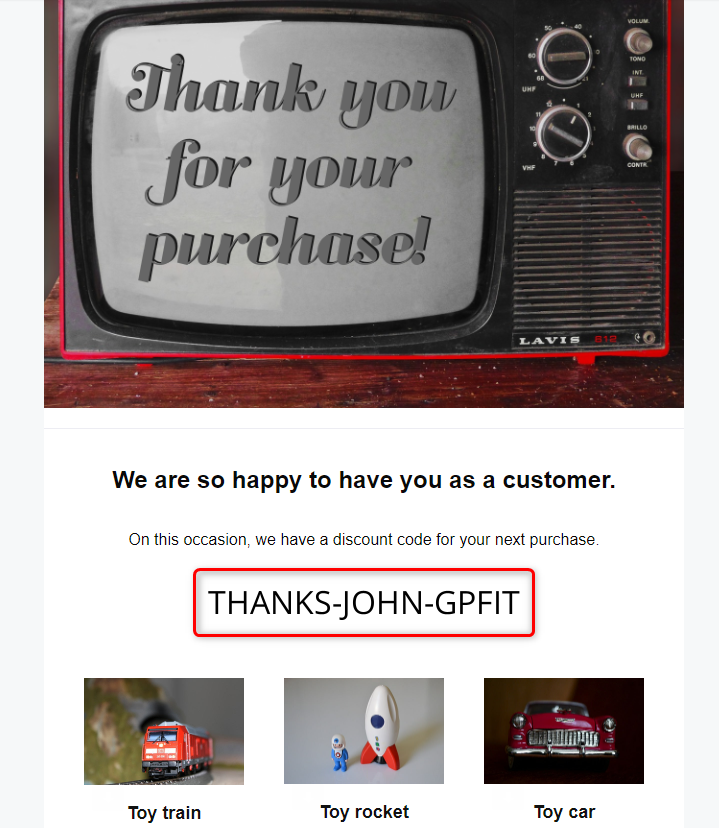
From now, when a customer buys any product in your store, will get an email with a unique discount code.

<figure><img src="https://3731721370-files.gitbook.io/~/files/v0/b/gitbook-x-prod.appspot.com/o/spaces%2F-LZdVZovthV0SPlgxS6Y%2Fuploads%2FTjYvlF1RR2Uk9TPRtK7x%2Fmailerlite-shopify-follow-up-on-purchases-email-personal-discount-code.png?alt=media&amp;token=777ef325-0cbd-4b79-a71e-1df5ac8bb267" alt="MailerLite automated email with a unique Discounteo discount code"><figcaption><p>MailerLite automated email with a Discounteo discount code for Shopify</p></figcaption></figure>